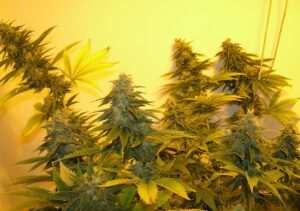
What is drip irrigation?
Drip irrigation is a hydroponic technique that heavily relies on a top fed regulated flow of nutrient solution.
Now, I know this might sound complex, but it is not that hard when you finally wrap your head around it. Many soil based systems use drip irrigation techniques to feed their plants, as drip irrigation can be used as a supplement to soil based grows.
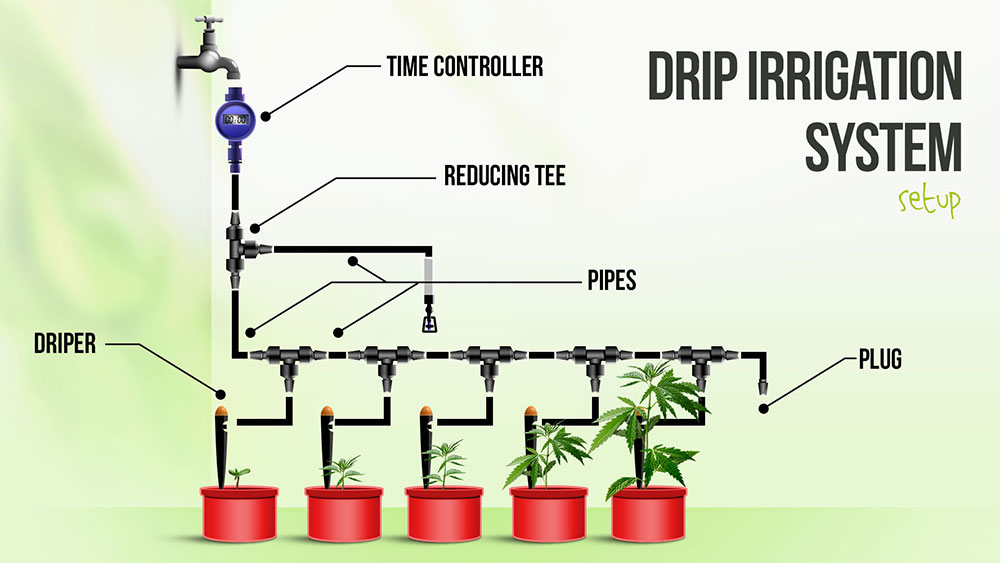
Drip irrigation is based around a set tubes with holes or outlets attached to tubes, which deliver water to each plant that is connected onto the system. This is so important for dry areas such as central Australia that they are thinking of feeding the whole country drip irrigation grown plants.
Water is pushed through tubes at a very low speed, as it is supposed to drip on occasion, depending on when and how much you want it to drip.
You can control the water pressure and water output with very simple equipment such as timers and pressure regulators.The rate of water distribution depends on what type of plant is being watered.
Drip irrigation is a very efficient hydroponic system, which means that the water usage is taken all the way down to the minimum.
Bonus: Hydroponic Growing eBook
Just type your email in the box below, hit the magic button and I’ll send you a free eBook which explains everything you need to know about hydroponic growing, including detailed guides for all of the 6 most popular growing methods.
Growers who used deep water culture systems or NFT systems will tell you that if you want to save up money on electricity and nutrients, you should definitely choose drip irrigation systems. Avoid lacks of knowledge such as this one by reading our complete weed guide for beginners!
Excess solution from drip irrigation systems can be recycled on other plants in your surrounding, while other hydroponic systems usually use up all the nutrients or the nutrients end up not fit to be reused.
However, in most cases the excess solution just goes down the toilet, and that is just not acceptable – at least from an environmental point of view.
Drip irrigation systems release just the right amount of nutrient solution that your plants need, saving on water, nutrients, electricity and effort. You won’t need to replace the solution inside the tanks because Drip Irrigation systems don’t require fresh water, as they always get it through dripping tubes.
Drip irrigation as a supplement to soil
As mentioned before, drip irrigation systems have several great advantages over other hydroponic systems.
- Drip irrigation is a low maintenance system that only has a few parts that can go wrong;
- Drip irrigation systems are both water and nutrient efficient;
- They are and more productive than soil only systems and they can complement them;
- This system is easy to set up and can be done on a budget;
When growing plants in soil, drip irrigation is a great way to make sure your plants are watered on time, without having to go to your grow and do it yourself. This way you can have a timer set up to water your plants every 6 or 8 hours, and you’ll have to visit the plant only once in awhile.
Drip systems are much more efficient than sprinkler systems simply due to the nature of the system.
While sprinkler use an abundance of water, drip irrigation uses next to none. Over watering plants grown in soil can cause nutrients in the water to slip deeper into the soil, before the plants get the chance to absorb them.
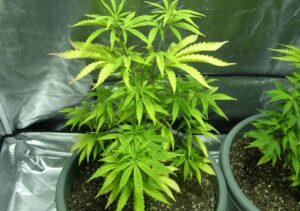
Drip irrigation may also result in faster growth because your weed plants demands for water are fully catered for and they won’t suffer from water stress, which is important as plants that are watered too much tend to be smaller due to either lack of nutrients or root problems.
Another thing to keep in mind when growing weed in a drip irrigation system is that the mildew may be reduced because the upper parts of your plants, such as the leaves and stems, won’t be “bombed” with water every time they are watered.
Instead, drip irrigation directs water on the soil so the upper parts remain dry and mold free.
Once you have your timers ticking and you are happy with how your setup looks, drip irrigation is an extremely low maintenance system as there won’t be too much need for adjustments and maintenance.
Apart from occasional checking if the emitters haven’t clogged, the system can be left to run itself as it is fully automatized.
Homemade drip irrigation systems
There are many ways to construct a hydroponic drip irrigation system. As with all systems it is important to understand the concept and then use your own innovation.
When building your own drip irrigation system you will need the following:
- Emitters – You will need one emitter for each plant. There is a wide range of emitters available inexpensively from hydroponic stores and garden centers;
- Spaghetti Tubing – You will need one to fit each emitter. As above, widely available everywhere;
- Opaque Hose or PVC Tubing – Depending on how many plants you intend to run in your drip irrigation system you will require varying lengths and sizes of larger tubing to feed all your spaghetti tubing. Basically, the bigger the system the larger the hose required. Two inches is enough for most small home systems;
- Water Pump – You will need a water pump to move your solution around. Submersible fountain pumps are easy to get and will normally do the job. Most operate at around 300 gallons per hour and this is more than enough for domestic systems;
- Buckets – Get a couple buckets, you can reuse old ones if you have them. Reusing old plastic buckets from previous growing attempts is a great way to cut down on costs. If you already have a bucket with a lid and net pots filled with pellets, you can reuse those as well.
More complex drip irrigation systems are composed of a pump unit, control head, main and submain lines, laterals and emitters or drippers.
The pump is used to make sure that the appropriate amount of water enters the system to keep it at low pressure. The control head uses a filter to clean the system, as well as to control pressure and discharge. Mainlines, submains and laterals dispense the water into the growing space.
Emitters and drippers are placed onto the laterals and are placed above selected plants in order to provide water, which is why this technique is often called top-down.
Easier alternatives for those starting out with drip irrigation can simply consist of two hoses with holes drilled into the appropriate places and some type of pump to control water pressure.
Assembling and maintaining a drip system
One of the advantages of a drip irrigation system is the ease with which you can add more plants to the system.
It just requires another spaghetti tube and emitter.
However it is really easy to build a stand-alone bucket system for your plants that will normally serve just one or two plants, depending on the size and shape of the bucket/tote that you use.
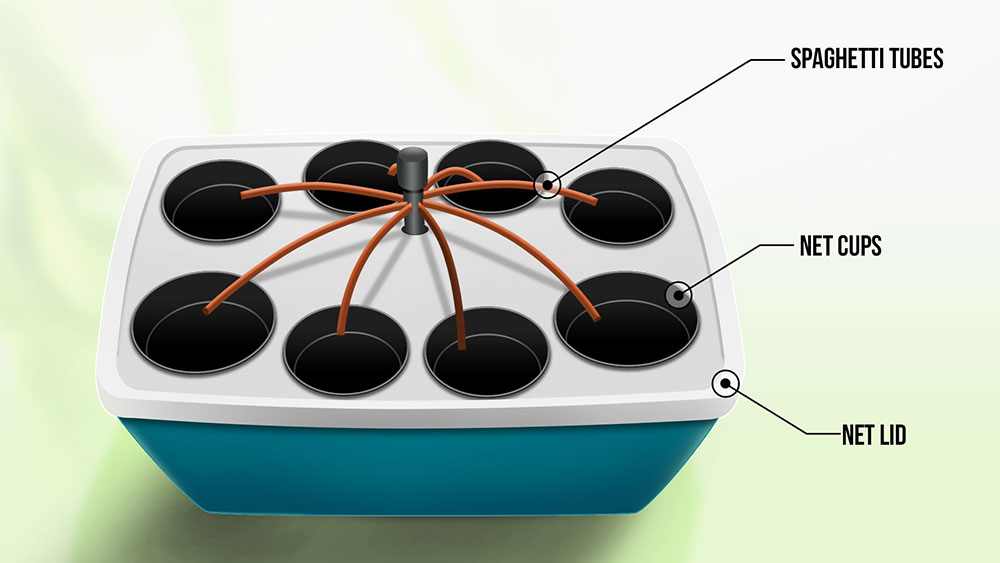
A bucket drip irrigation system basically works by growing your plant suspended in the lid of a bucket.
A water pump pumps nutrient solution up from the bucket via a tube through the lid. The solution trickles over the plant’s roots and falls back into the bucket to be recirculated.
In order to assemble a drip irrigation system for your cannabis grow you will need to do the following:
- Grab the buckets and make holes on their lids, approximately 10 to 12cm in diameter. Drill one hole in the middle of the lid;
- Drill another hole, 5 cm in diameter, and close to the first one;
- Drill a smaller hole on the side of the bucket just below the rim for the;
- Attach the ½” tubing to the water pump;
- You will now need to reduce the size of the ½” tubing as this will be too big and will flood the plants;
- Attach a ½” to ¼” reducer to the open end of the tubing in order to reduce it;
- Attach a 4” length of ¼” tubing to the reducer, and place the pump in the bottom of the bucket;
- Instal the power cable through the hole in the side;
- Feed the reducer and tubing through the smaller hole in the lid, the one next to the big one;
- Fit the lid to the bucket and push the tubing back into its hole so that the reducers sits flat on the top. By this point you’ve done the biggest part;
- Fill the net cups with expanded clay pellets;
- Use a clip to place the ¼ tubing so that it flows into the growing medium (pellets in the net cup);
- Don’t forget to use a timer on your plug to run the pump for around 6 minutes, 3 times per day.
- Add plants to the system and watch your plants grow.
To be clear, drip irrigation systems are systems that are meant to be for outside growing, there are many chances of having leaks in the hoses and you might make a mistake which can cost you your parquetry.
If you have a garden and you plan on growing cannabis in soil this will be the perfect, and very cheap addition that can improve your yields largely. Make sure to send us pics if you decide to try out our Drip Irrigation system.
Related Posts


Alex Trpkovich
Experienced cannabis content creator, writing about the latest cannabis news, stock market updates and cannabis culture.
Ed April 1, 2018 at 4:28 pm
Hello men .. thnx for the info .. my only question is how do I calculate my feeding schedule.. I water my plants once every 2 or 3 days .. so I just need to divide the quantity of gallons that I use / 3 days ??
Alex Trpkovich April 2, 2018 at 8:24 am
That's right. Good luck with your grow!
Dan November 30, 2018 at 12:57 am
Helpful article, thanks. Do you have any advice for amount of runoff to aim for with an automatic drip in soil? Same as hand watering?
Alex November 30, 2018 at 9:41 am
well, I'd generally advise for less of a runoff because it's an automated system so I'd suggest as little as possible, but that's just my opinion.